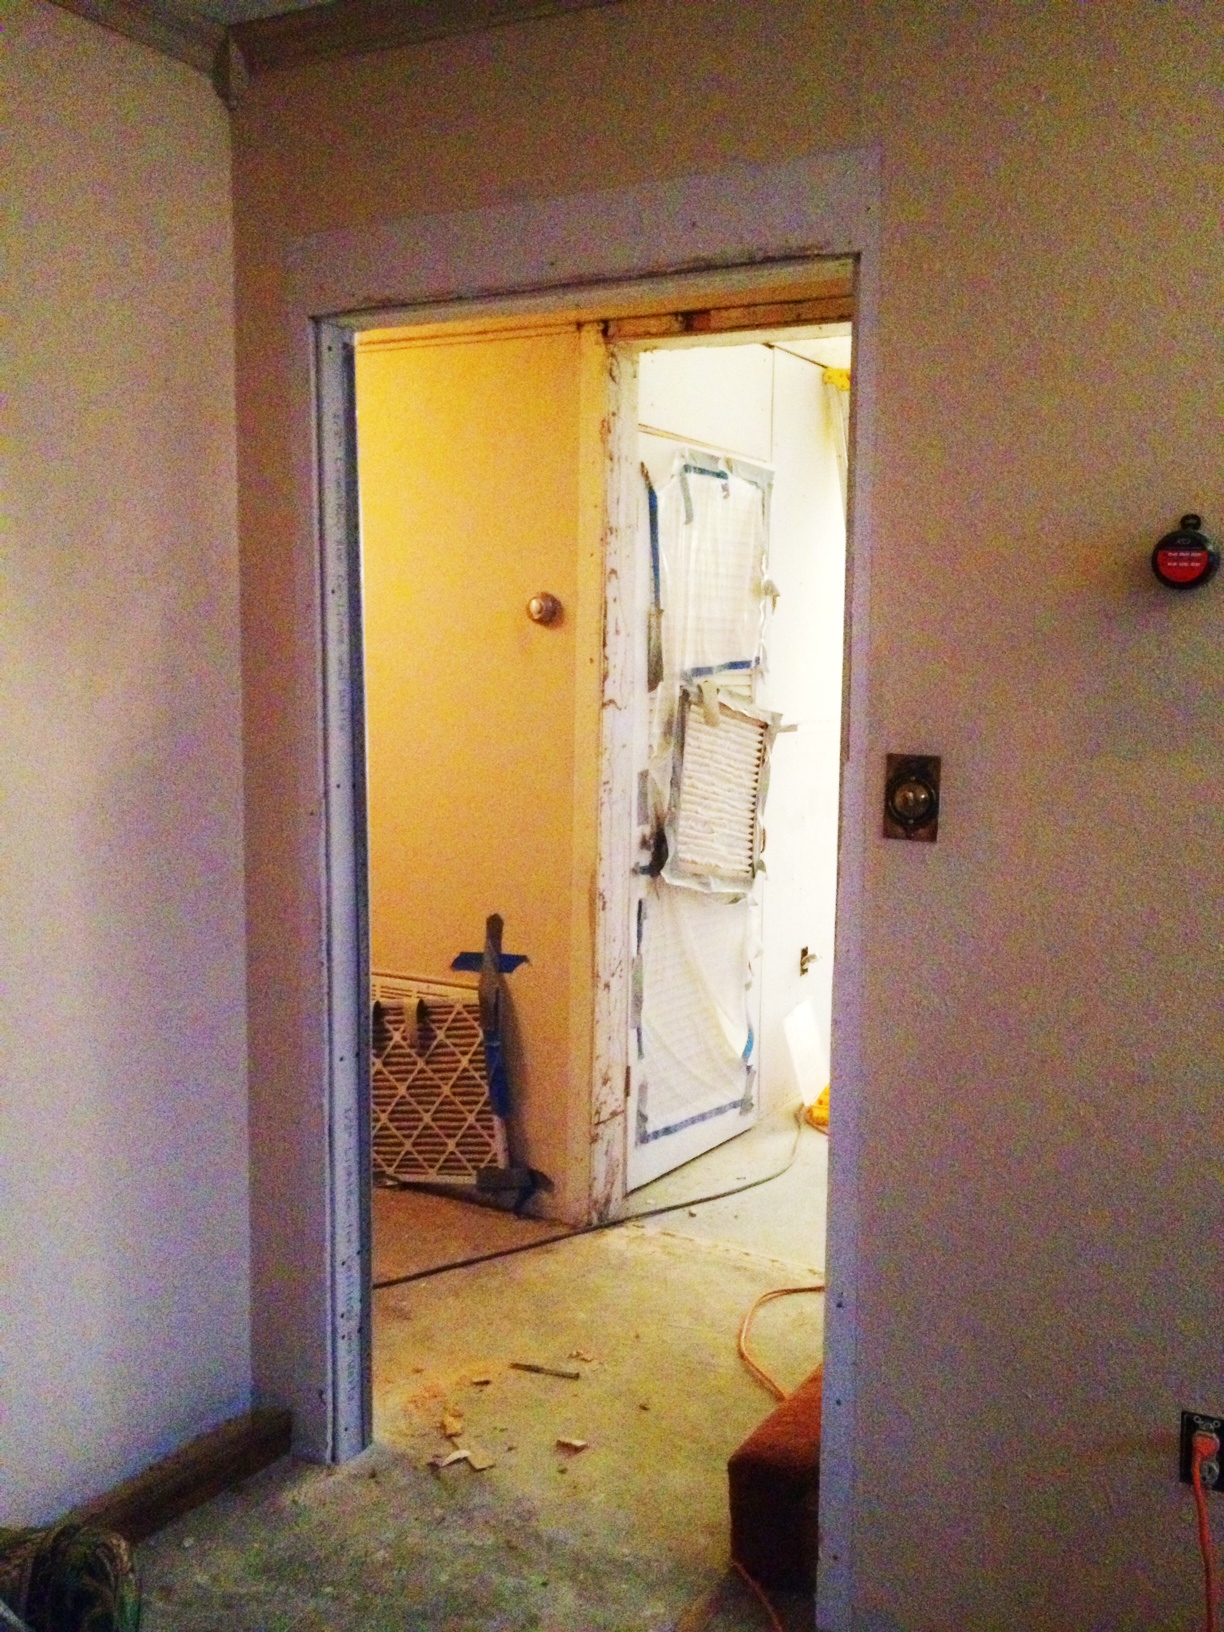
the 30 inch vintage door. gorgeous!the now 40″+ wall opening where the door once was.
There is a beautiful vintage glass panel door that separated the living room from the rest of the house, which I was actually quite excited to use when I have client meetings, but when we removed the door and the trim we found out exactly why they used 8″ wide trim – the wall opening was much larger than the 30″ door! Jason and I talked it over and decided we’d repurpose the door elsewhere in the house (linen closet? frost the glass and use it on Jason’s office?) so we could widen the opening to help the flow of the house. It made a huge aesthetic difference, and it made it much easier to move furniture in when the time came.
I am a little sad I won’t be able to close off my “office” from the rest of the house and that we won’t have that gorgeous door hanging there any more but it will give me further incentive to get the garage insulated and drywalled so I can have another place to work.
Due to our limited budget this winter we won’t be replacing any flooring that we take out during our initial renovations so we made the tough decision to live with concrete flooring downstairs instead of the existing rose pink carpet for two reasons;
a.) since this was Jason’s grandmother’s home for as long as he can remember the more stark visual changes we can make, the more like a new home it will feel for him and the more comfortable he will be, and
b.) because dusty rose is not a color you’ll likely find in our interior design palette. Ever.
The carpet tack-strip was nailed into the concrete slab so we pried that all up as carefully as possible in order to not leave too many pock marks. Since the cottage began as a horse barn and then we think later became a car garage, it was really neat to meet the old garage floor under all that carpet; oil stains, splattered paint and a rough finish texture made for some interesting character.
Though we pulled up all the pink carpet from downstairs we did, however, leave it on the stairs for now. We both agreed that some rose pink on the stairs is better than plywood splinters on bare feet. ;)
Second only to the kitchen, the downstairs bathroom is another of our main targets for pre-move-in renovations.
We’ve removed the three layers of floral wallpaper, the floor tile, the wood paneling, the sink and vanity, the toilet and everything else in the room except for the lights and the bathtub (curses! We haven’t found an affordable clawfoot tub yet so that’ll have to wait).
images courtesy of houzz.com
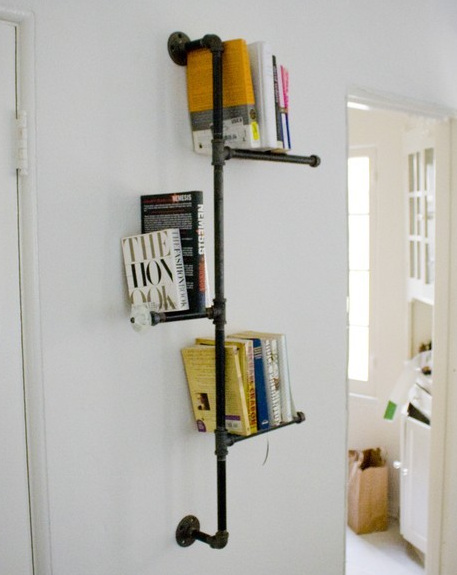
As soon as the walls are textured we can install the floor tile and move the toilet from the kitchen back into the bathroom where it belongs. We’ll have to put a hold on the wall tile in the bathroom for now but it’ll be worth the wait in order to afford the texturing. I’ve always wanted white subway wall tiles with the little white hexagon floor tiles. It’s just a classic look that can be dressed up any-which-way you please. I’m thinking white subway tiles with charcoal grout and a finishing ledge 4′ up the wall and then a warm green earthy paint up to the ceiling. I also found an industrial shelf/towel rack that I can make for under $90 at my home box store:
Add some wood planks on a few of the horizontals and it makes one mean shelf unit.
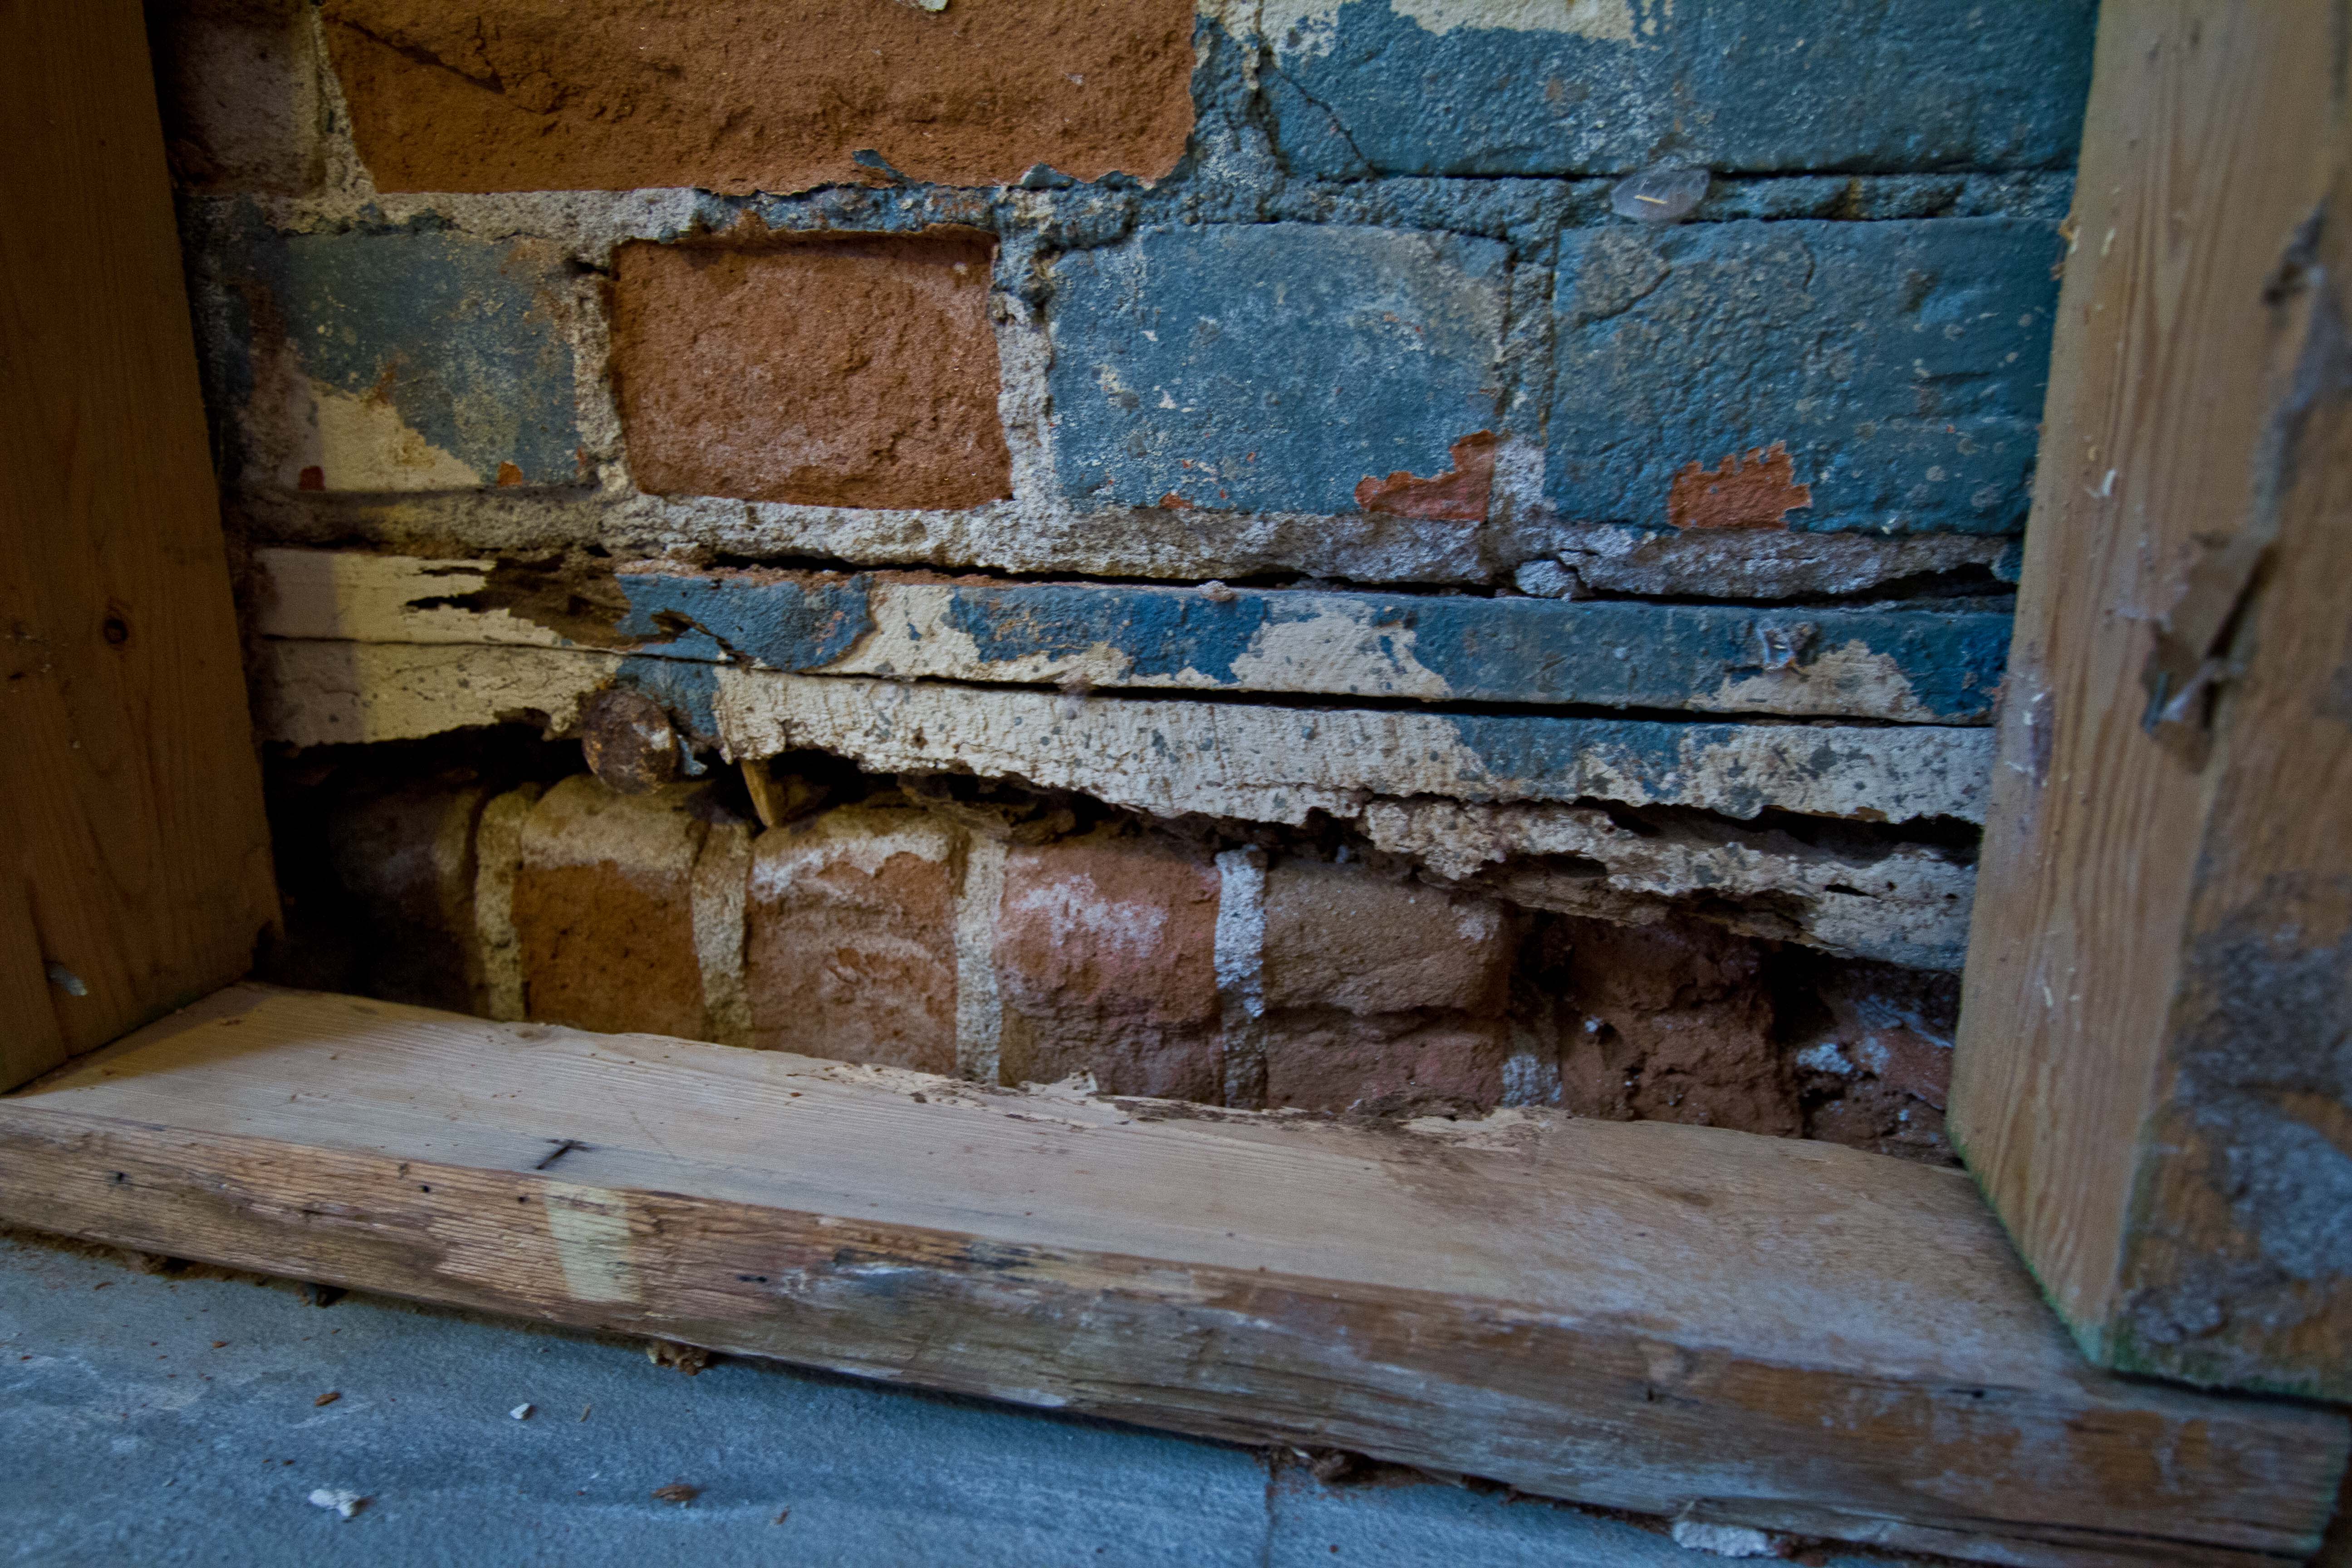
When we opened up the East wall in the kitchen to work on electrical we found the original brick wall behind the framing – oh sweet Jeebus is it pretty, all painted up in sloppy coats of blue and white! – we noticed there are a few strips of wood layered in with the bricks; two near floor level and one at chest height. We also found the floor level wood has been almost completely eaten away by bugs in a 5 foot long area. Little bastards. Though I don’t know which generation of bugs I should hold a grudge against since the house has been around for so long. It could have happened during the 30’s when everyone was starving, including the bugs. Can’t be mad at that generation… ;)
I asked for my dad’s advice because I thought it would be perfectly reasonable to fill in the bug holes with concrete to restrengthen the area and he agreed, but he recommended we use mortar instead since it’s a finer mud to squish further into the crevices. On one of the weekends I wasn’t around to help, Dad repaired it by pulling out the remaining bits of wood and packing in the empty spaces with masonry mud. It’s not a pretty fix but it’ll give us a few more years of stability on that wall and maybe keep the bugs away. My sweet husband added a finishing touch of the repair date and our initials in the wet mud. I’m such a lucky girl :)
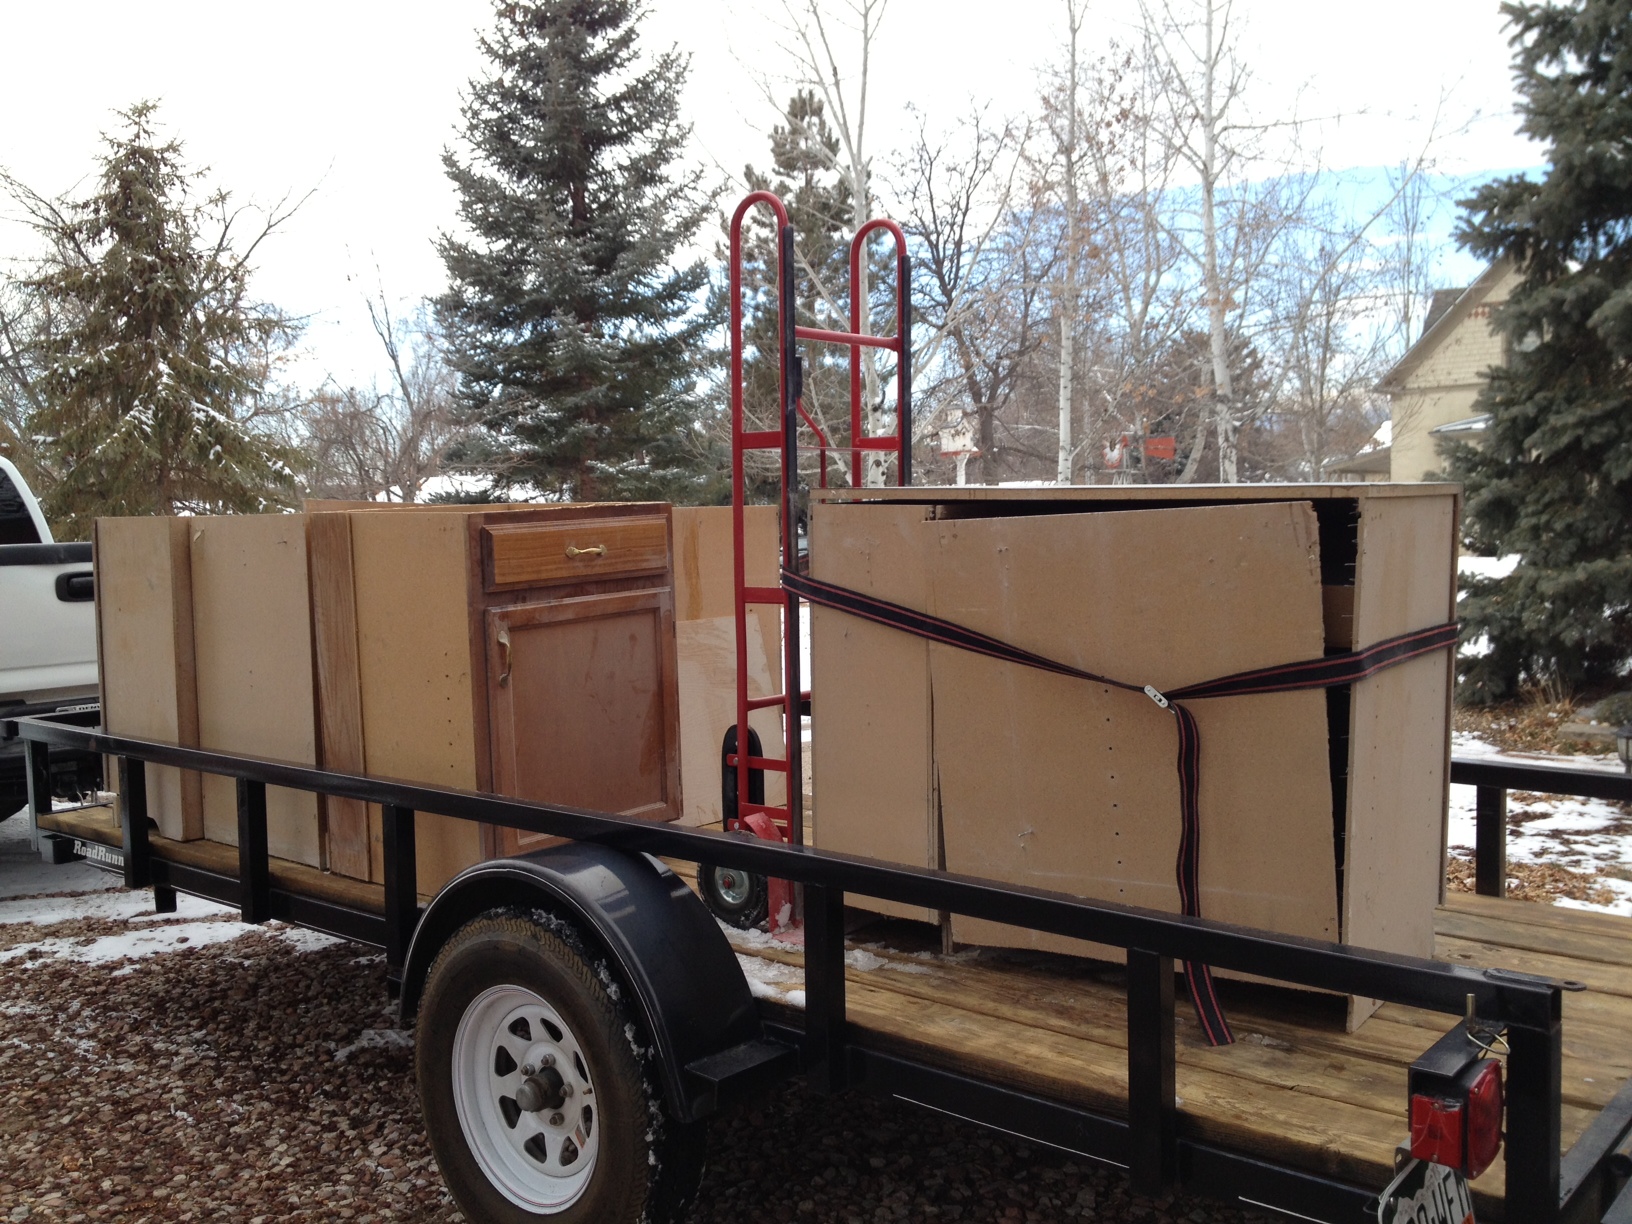
Once we moved them away from the walls they practically self destructed. Wimpy things!The cabinet faces are much nicer than they look, they’re just covered in cement dust.
Due to our upcoming expenditure on drywall texturing we are already feeling tight on funds, so in order to save more clams we decided to reuse the old kitchen cabinetry for now. The cabinet bodies were in nasty shape and the drawers weren’t exactly smooth rollers so we loaded up all the cabinets and moved them to my dad’s workshop so he could rebuild the particleboard structures and put the cabinet faces back on. (Thank you, Dad!!!) Once we move in we’ll have more time to resurface the faces and give them a little more style.
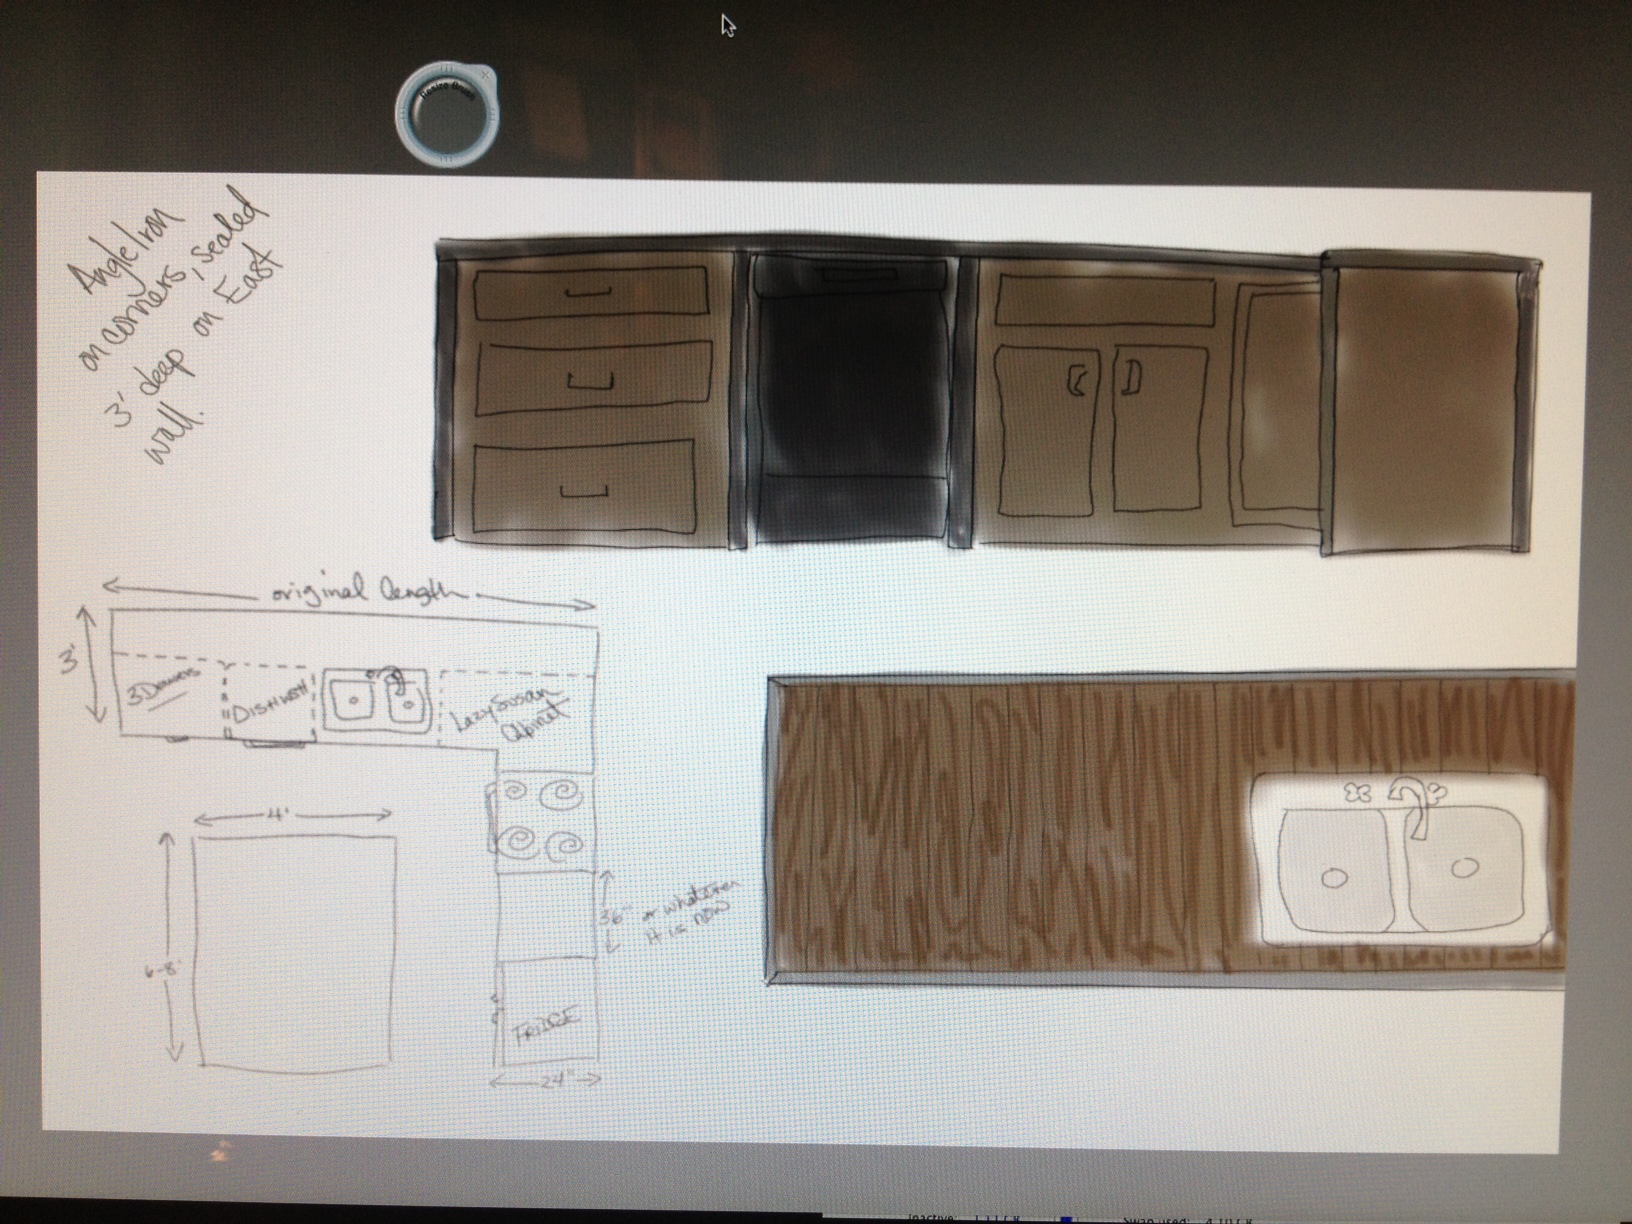
I made an executive decision, met with MUCH gasping and contention from all parties, to make the longest countertop in the kitchen 36″ deep instead of 24″. My reasoning is that in our current house I don’t feel like I have enough counter space and, dammit, I simply want more elbow room. After a toaster, espresso machine or mixer is plopped down against the wall it leaves me only about 12-16″ of workspace left. Not enough for this dough-slingin’, veggie-choppin’ girl. I figure if the counter is 36″ deep it will allow my mixer and espresso machine friends to continue to live along the wall without me resenting them. Plus, it will give me an extra foot of counter space behind the sink to maybe grow a few more tasty cooking herbs once life starts to get back to normal post move in… which I hope it will do rather quickly. I’m growing a bit weary of my plate being so full.
A drawing I made for Dad so he could understand my alterations.
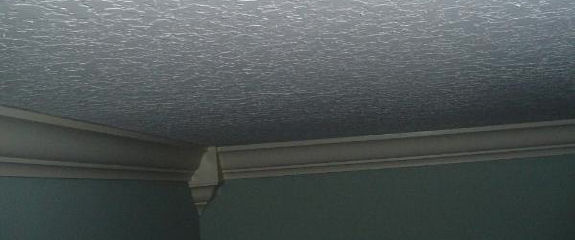
While the kitchen electrical was underway we also removed all trims and wood borders in the house and steamed all popcorn from the ceilings to prep for drywall texturing. Originally the plan was to just texture the walls we had ripped into, but we realized since there will be so much new drywall as well as old dented/wonky/crooked drywall needing it’s flaws hidden it’d be worth doing everything all at once; and if we don’t do it now we never will once we’ve moved in… so it’s been decided to have all the walls and ceilings retextured.
Also, in our original plan (can you sense a pattern of disappointing realizations here?) we would tape and texture everything ourselves to save money but after the cement floor grinding fiasco I am heeding the majority vote and hiring this one out – regardless of cost – which means even more penny pinching elsewhere. We have a bet with my dad and stepmom about how much it’ll cost and the losers have to buy lunch. We haven’t gotten any estimates yet, but I’m assuming it’ll be something astronomical and vomit-inducing like $3000-3500. Not sure how we’re going to pull this one off yet, but there has been talk of a 2013 Xmas and birthday “advance” from our parents which would help us put a an ever-appreciated dent in the bill.
A few years ago we helped Dad drywall his newly built 2000+ sqft. workshop. It took six of us working for five weekends to get the whole place drywalled, so dad decided to hire out the rest. The tape-and-texture guys came in and finished the job beautifully in only a few days. I can’t imagine the thrill of walking into our house for the first time after it’s been textured and we didn’t have to spend weeks doing it. I think this purchase will be well worth the excruciating pain it’ll cause our wallets.
Why do we have to texture at all? Texturing helps reduce the visibility of any flaws in the drywall tape and mud job, as well as masking many blemishes the wall will inevitably receive during normal home wear-and-tear. If you have a perfectly smooth wall and you make one dent or ding, it’s really going to stand out, and in our household that would be a chronic problem. I can’t even imagine how bad the walls would look if we had kids. It’s bad enough now just between my general klutziness as I move my photo equipment around and our kooky wall-bouncing cat.
Sowhat textures are there to choose from?Why, I’m so glad you asked! ;) Here is a helpful link to the most common textures used today: http://www.drywallschool.com/textures.htm
We are pretty fond of the plain-old California Knockdown texture that we have in our 2005 house, and thought that using the same texture and the same bullnose corner bead (fancy rounded wall corners) would give Brake Manor an updated look using the least amount of effort and cost.
So the good news is I have been unexpectedly graced with a plethora of photo (and video!?) gigs since the beginning of January, and the one unfortunate effect of such livelihood awesomeness is that I’ve not had as many chances to work at Brake Manor as hoped, and the lack of progress is starting to make me nervous.
Alrighty, so since I’ve been such a slacker at documenting our progress, I’ll start where I left off and in the next few days I’ll work on writing up each task we’ve accomplished so far.
The kitchen floor cement sanding is fiiiinally finished and it looks great. We’re really excited to slap some sealant on it and see it all glossed up and sassy. There are a lot of larger pebbles in some areas of the cement which gives it a neat pattern now that it’s been sanded down.
Next, we brought in a master electrician friend in mid January and at every turn he’d shake his head and slowly say “oh gawd” as he inspected the electrical system, so we knew we had to tackle the worst of that before anything else.
It took me about 4 hours to go through the house and identify all circuits since none of them were labeled beyond generic terms such as “front of the house” and “half of the kitchen”. To start, I arbitrarily renumbered the breakers just to have a clean starting point. Then I used a little light-up outlet tester and made passes through the house checking each unknown outlet with one breaker turned off at a time, marking them off on my room map as I went. On those rogue outlets that didn’t seem to match any of the breakers, I plugged in my boombox and blared it loud enough that I could sit in the attic and flip each switch until I found the one that killed the noise.
My little map I made for documenting our work.
Once we knew which breakers controlled what, the next project was to open up two of the four kitchen walls and pull out all the electrical. The plan was to reinstall it correctly while moving existing outlets to standard heights and locations, and we decided to add a few more while we were at it. It was a royal mess in those walls. Random uses of 14-12 gauge wires; no grounding on the garbage disposal; splice after ghetto splice; nothing stapled down; each outlet was at a different height and one was even embedded into the window trim for some reason… it was so much fun learning the do’s and don’ts of electrical as we pulled the old work from the walls.
Left wall: old electrical. Right wall: new electrical. Much better!
As soon as the old kitchen wiring was removed on the South wall Dad gave me a how-to lesson on the first two outlets and then we split up and tackled the rest of the kitchen. Learning life lessons from my dad makes me realize just how lucky I am to have him around and it also makes me feel a little sad that he never had a son he could teach these things to since he’s such a DIYer (unfortunately his only son, Seth, has Down Syndrome). I figure a handy-girl daughter who is eager for any wisdom he’s willing to impart unto her has still got to be better than nothing though.
Jason and Dad posing against their will for my documentation :)
Dad and Jason added a 3-way circuit to one of the two kitchen lights since there was no switch by the hallway entry. It took me a while to wrap my brain around the logistics of how to wire up a 3-way but Dad made schematic sketches on the back of some drywall for me and it finally clicked. I can’t help but be amused at what someone will find in our walls down the road on the next remodel adventure; shopping-list notes, circuit drawings, and several mushy J+A=Forever‘s drawn on the backs of the drywall.
Just me, workin’ on some electrical.
When we removed the wallpaper in the kitchen we had found phone numbers and ToDo notes on the drywall by where the phone jack was which made me remember how much history this cool little cottage of ours has already seen just since it’s last makeover. We also found pennies, 22-bullets, seeds, toys and newspaper clippings in the walls from whomever did the last renovation so we’re going to be sure to at least add some coins from 2013 in all the walls we’ve worked on too.
The Last of the Tile’hicans. It was a little sad to remove the last one from it’s place.
I originally thought the task of removing tiles from concrete was a dirty, thankless job but now that I’ve moved onto separating the Thin-Set from the concrete I have a renewed respect for the folks who do this sort of work for a living.
As usual, I Googled for answers on what to do for this next step of my project and I found that using a floor buffer with a $350+ diamond disc is the best way to sand the thin-set from concrete floors – but between renting the buffer machine and buying the diamond disc (you can’t rent, you have to buy those), it would have cost $500-700 which would have negated the money-saving purpose of sanding the concrete floor so we can stain it in the first place. Re-tiling the floor would have cost around the same amount.
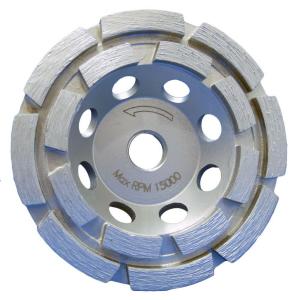
This is the 4.5″ diamond cup I used to grind down over 300 sqft of thin-set. Do not try this at home!
Alternatively, I realized they make diamond discs for the cute little 4.5″ grinder that came free with our SRS roto hammer drill… so the conversation in my head went like this:
“Whoa, whoa, whoa. Do you realize how long it would take you to finish 320+ square feet of floor with a 4.5″ diamond disc?”
“So what? We do what we have to in order to save mass amounts of cheese. The mini diamond disc is only $40 and we don’t have to rent a machine for it so we can take as long as we want to finish the job. I don’t see a problem here.”
“Psh, I’m glad it’s you and not me having to do all that grinding. ….wait!”
“Too late! I bought the mini disc and we’re doin’ this! Game on!”
So the disc was purchased and while Jason finished removing the last of the tile in the laundry and downstairs bath, I started grinding. I tried wet grinding and I tried dry grinding. Both had their perks but I decided wet grinding was too slow and too messy to clean up with the shop vac. Apparently those little vacuum attachments that suck up the dust as you grind are not a big seller so none of the local tool stores carry them. Because of this, I decided to grind a few square feet then vacuum the area as best I could to try to keep the dust to a minimum… haha! What a sweet, ignorant woman-child I was.
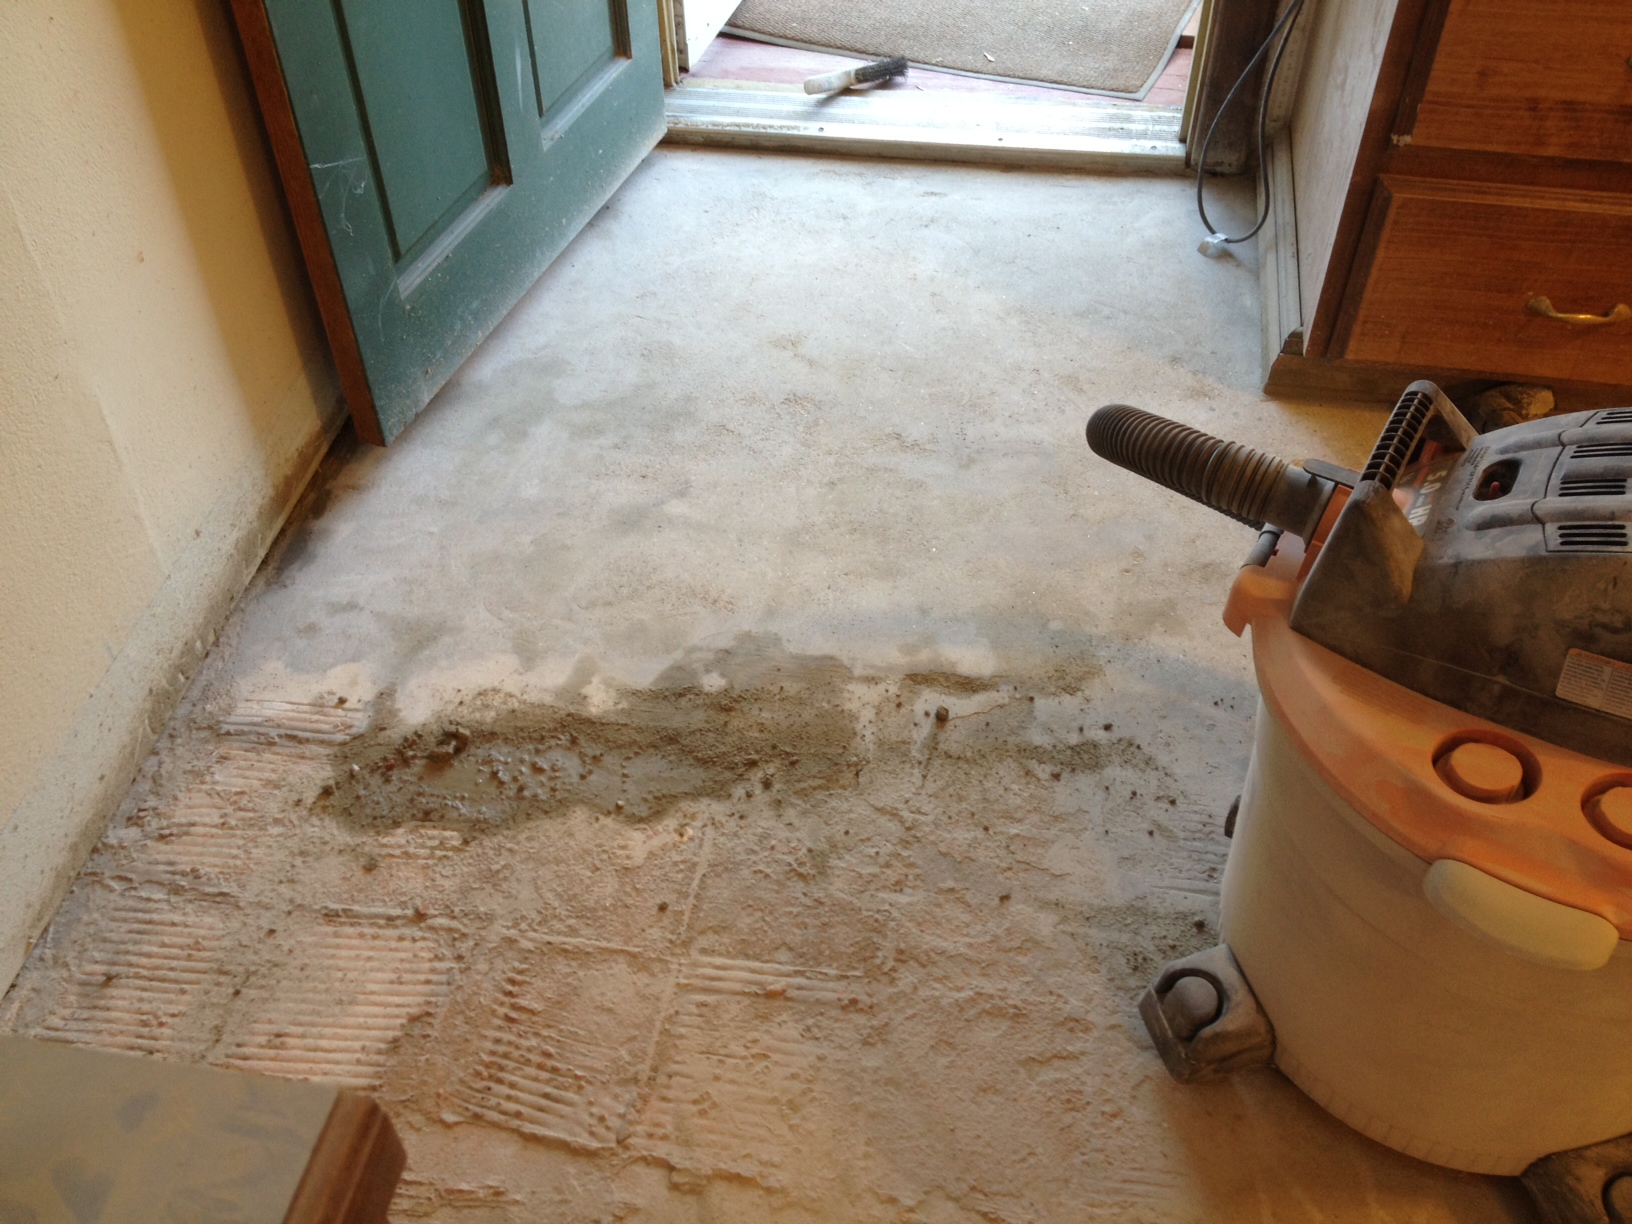
This is the dust accumulation from only about 3 hours of grinding.
Dust. Dust EVERYWHERE! After grinding about 12 square inches the room would be thick with a fog of dust. It was terrible.
I finally figured out that by leaving all doors and windows open and blasting a work fan on the area I was grinding I could at least keep visibility around 85-90% and I could do more than a foot of grinding between vacuumings.
I am fully aware that this was not the best, nor the safest way to go about the job and I apologize to any neighbors that might have been hit with my could of dust – but after working for 7 hours and seeing only about 30 square feet of progress you get a little crazed and desperate. I worked on this project for over two weeks, making very little progress every day… near the end of the project I was often in tears over how sick of grinding I was.
Thank heavens I had the amazing respirator I had, it would have been extremely dangerous had I not worn that level of protection. The dust wound up in every nook and cranny of my ears, nails, between my toes and other odd places. My skin began to break out in rashes all over and became scabbed and rough as if I’d been sandblasted. My hair became dry and brittle and nearly impossible to wash because the trapped dust turned to cement mud as soon as I hopped in the shower. My knees were bruised all over from kneeling for so many hours even though I wore kneepads. My hand joints became so sore and achey that I felt like I was getting a terrible case of arthritis – I am only now, 4 days after finishing the project, starting to not feel such pain in my hands.
The moral of this story is that there are some projects that aren’t worth taking extreme shortcuts on. This was one of them. If you need to grind thin-set from the floor of a small room, say 80-100 sqft., then using a diamond disc on an angle grinder will work beautifully and the project should only take a couple of days and cost you a measly $40 plus a replacement shop vac filter. Otherwise, hire a pro or at least rent the appropriate tools if you can afford them. Other tools you may want to consider when grinding thin-set are:
an awesomesauce shop vac and a spare filter
a wire scrub brush to loosen up the mud residue if you’re doing wet grinding
goggles are better than safety glasses – the dust will really irritate your eyes
knee pads
PRO-GRADE RESPIRATOR (this is a MUST)
good jammin’ tunes so you don’t go mad listening to the grinder screech for hours
Full body clothes and gloves. Expose yourself to the dust as little as possible
This is an example of the thin-set I was working with. it was between 1/4″ and 1/2″ thick in places. The smooth area near the door is how it looked after I worked on it.The floor is finished! The dust clean up took me another 3 hours and 3 clean-outs of the shop vac.
I haven’t quite finished writing my post about removing Thin-Set from concrete, but I just had to gush about this wicked Craigslist find I picked up.
I was looking for a simple, maybe vintage or shabby-chic pedestal sink to replace the outdated vanity in the downstairs restroom of Brake Manor when I noticed a fairly unique post that I just couldn’t pass up. Most of the sinks I had found were between $60-120, but even the $120 sinks were all fairly plain and boring. There was one posting, however, that offered a strikingly unique modern sink (one I didn’t think I’d normally have been drawn to) with little porcelain shelf wings on the sides, metal towel bars, and a side mounted faucet… all for only $75.
I emailed the gal, we chatted back and forth, and I told her I was smitten and wanted to come pick it up ASAP. We set a time for the next night since she was located about an hour away, and that was that. …I thought.
I emailed her again on the day I was to pick up the sink, thinking it would have been smarter of me to get the dimensions before committing to the purchase, but she must’ve been at work and didn’t respond. So, being the resourceful gal I am I started Googling for similar images trying to find this sink and it’s dimensions. After a few minutes, I found it. ….aaand I also found the original cost of the sink:
Though I’m not a materialistic girl I have an unexplained penchant for expensive items. I could walk into any store and be immediately drawn to the most expensive item – I found this still rings true, even on Craigslist.
The sink we picked up has the European drain option -which brings the cost up to the $1010- and a slightly fancier faucet mounted on the left side of the bowl. Once I knew the original cost of the sink and factored in the cute faucet I couldn’t help but laugh. I am known for being drawn to the most expensive item in a store, even if I have no previous knowledge about the product at hand. I know nothing of mountain bikes, but if I were to walk into a specialty shop I have zero doubt I’d be drawn to the only $15k bike in the store.
When Jason and I picked up the sink we learned the gal selling it is an architect in Denver and routinely receives rejected items from high-end projects when the client decides to change their mind last-minute.
So now, in our modest shabby-chic DIY cottage, we will be sporting a very out-of-place $1000+ Porcher designer sink that only set us back $75 and an evening of drive time. I am thoroughly entertained by this! It just goes to show how one man’s trash is most certainly another man’s treasure. Someone originally paid $1k for a stinkin’ sink, then tossed it aside on a whim, and someone who either didn’t know how much the sink cost -or didn’t care- sold it to a second-hand-seeking DIYer for $75.
Next steal I’m hoping to make is a vintage iron claw-foot tub. Any suggestions on where to look in Northern Colorado?
Now how do I get one of these bad boys for a steal?
Question: How to get those damn tiles off of a concrete floor without breaking my back?
After struggling to find a means of removing the tile in the kitchen I stumbled across a YouTube video demonstrating how well a rotary hammer drill accomplishes this task. Soon after, I found a deal on a 1″ roto drill and a “free” 4.5″ grinder for only $199 at Home Depot (I swear I’m not trying to promote Home Depot, they’re just the only decent home improvement box store in my area) and once I realized that for the same price of renting a massive tile stripper machine for one day I could play for keeps with a hammer drill and grinder, the drill and grinder won. I mean, hey, I should have plenty of projects in the future to use those on.
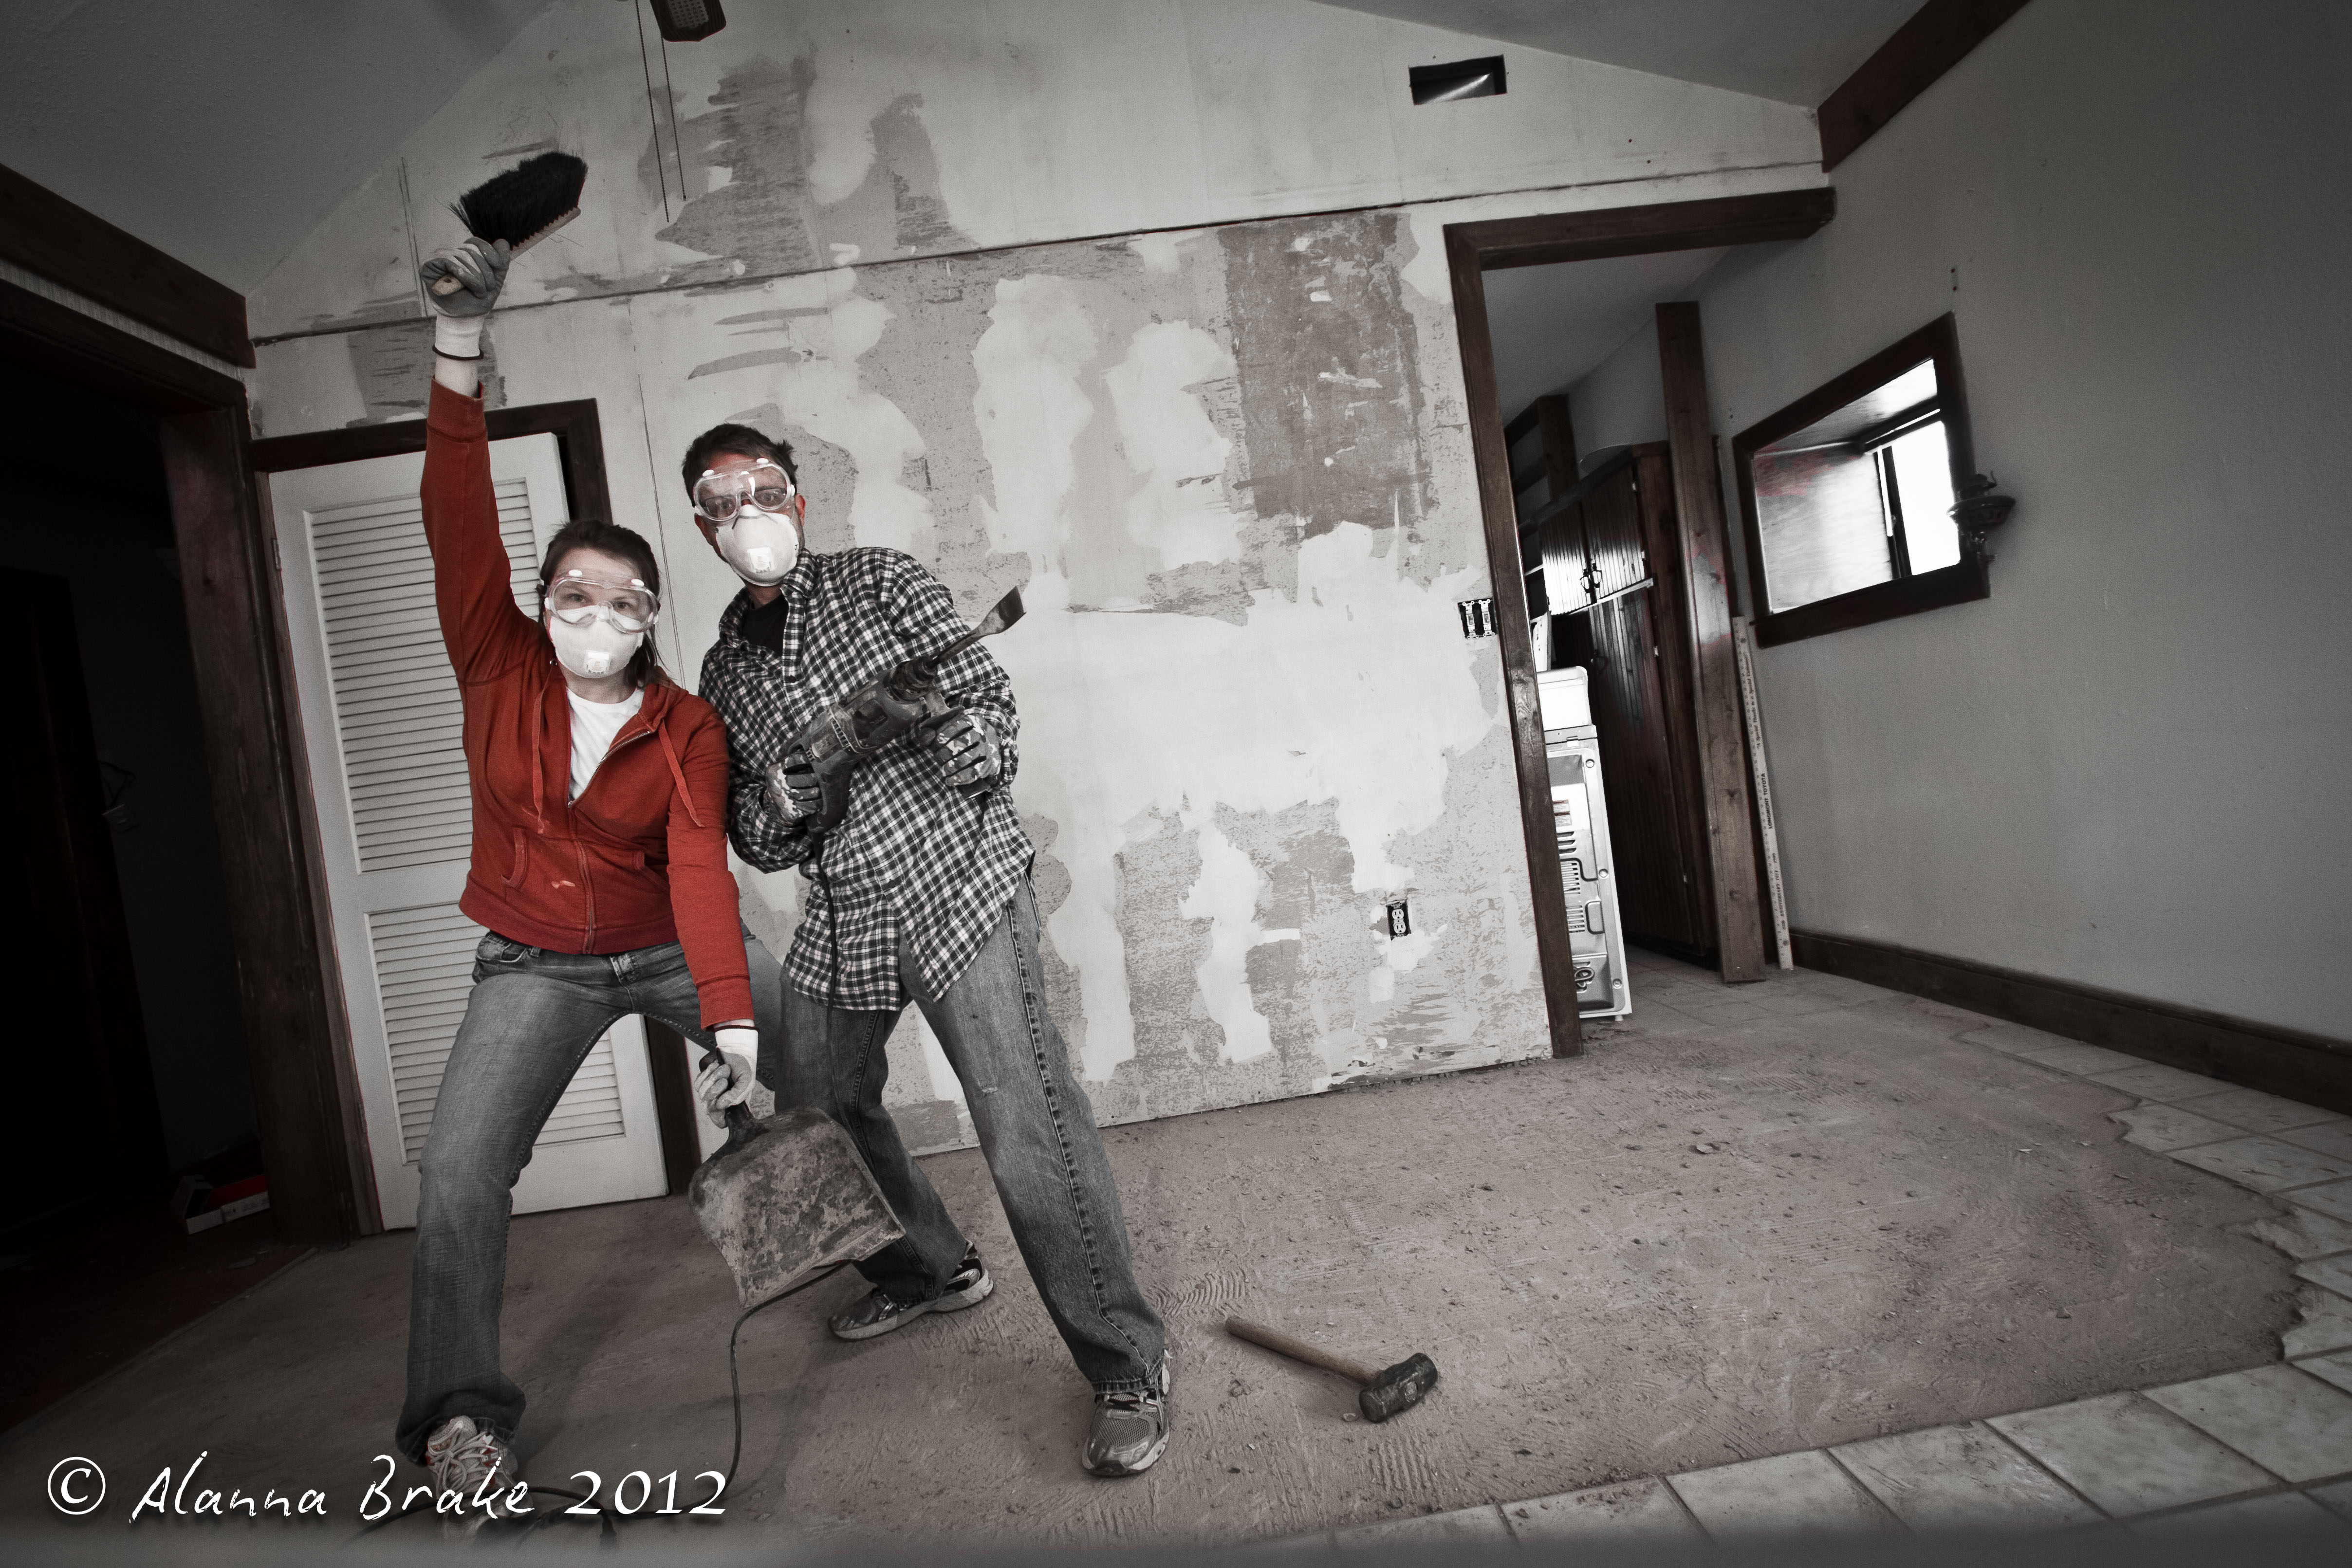
As much fun as it is, tile removal is not a pretty job. It’s dusty (for health’s sake, wear your dust masks, people!!), and noisy, and not at all glamourous. Expect to get hit with loads of flying tile shards as you work. But daaamn does it feel good to rip into materials as solid as ceramic tile and concrete like they’re butter under a warm knife! I also love the fact that a hammer drill is just as easy for a weakling like myself to use as it is for a buff man. All you have to do is gently press the drill to the edge of the tile and off it goes! It does all the hard work for you, and in fact, it works better if you put little effort into it at all.
In roughly 8 hours of work time we’ve removed all floor tiles in the house except for the ones in the laundry room and downstairs bath. The only reason we haven’t knocked those out yet is because we need to keep a door or window open so our fan can help manage the dust and the weather simply hasn’t been cooperating this week. Right now, as I type, it’s a balmy 2°f out there. ::shivers::
Tomorrow through Friday should be much warmer, around 45°, and hopefully I can finish all tile removal by the weekend so I can start cleaning up the 1/8″ of cement dust currently resting on EVERYTHING in the kitchen. Yuck.
Coming soon: how to grind Thin Set (the cement-like glue stuff you’ll find under the tiles) off of cement.
You should know we’re giving our fiercest tile battling war-cries under those masks.
Alanna is a free spirited, techie-turned-entrepreneur starting a new adventure in a vintage cottage with her awesomesauce hubby, sassy cat and a little green flying monster